Resto & Custom
Mazda 323F Lantis
It all began with a JE Toys Dodge Viper. That completely destroyed beater was in my resto project box for years and since i´ve found another one in nice condition i left this one untouched.
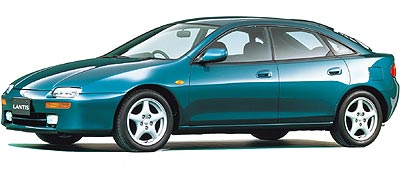
At the same time, Mazda Lantis is a beautiful four door coupe that has never been produced in diecast small scale. Ever since my brother got this car i wanted one in small scale for my collection. Herpa has done a plastic model in 1/87 and there are some 1/24 Kits and a 1/43 handmade model that i tried hard to get but all in vain.
My favourite customizing materials - mustard tube sheet metal and UHU Repair All Power Kit - a 2-component adhesive, some kind of putty, i think - have helped me on my way through this project. another bunch of tools included dremel a lot of sandpaper, knives, scissors, a hammer and some other tools that make Tim Tailor look like a baby .
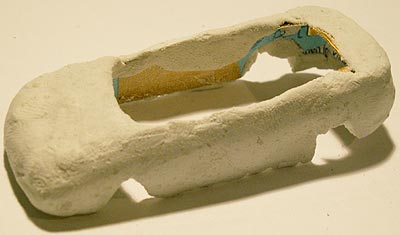
Although i don´t really have the space and time to do something like that, i still decided to use the short soccer seaso break and spend some of my time trying to customize a model of the Mazda Lantis or 323F as it is called locally. the finished "body" made me happy in its proportions and size. on to the next step.

After gluing together different sheet metal parts, i put the Repair All around the metal body. it had to dry over night to be completely stiff.
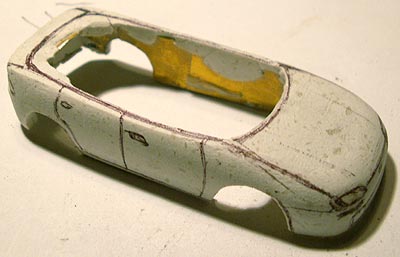
Next day i modeled the body in the shape i wanted it to be and drew the characteristic lines onto the body of the car.
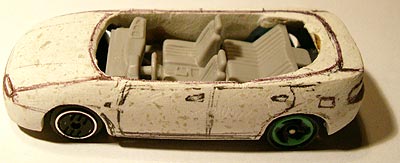
I added the base and interior of a different custom project to see how it looked like. Thanks to dremel and the consistence of the materials the shaping went easily.
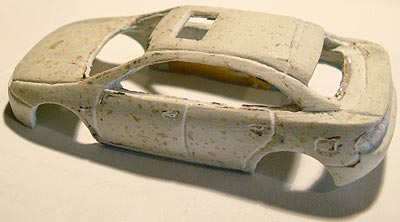
After i was happy with the body itself, i added the roof. first i made a sheet metal "skeleton" and then i put 2-component "Repair All" over it and modeled it with Dremel and sandpaper.
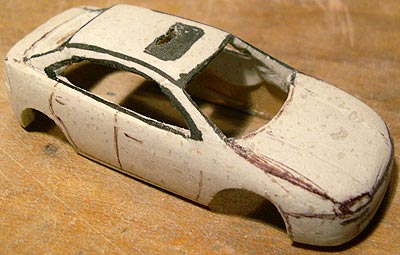
Afterwards i engraved the doorlines and other typical features to the body. The lines didn´t turn out perfectly, but make me happy all in all.
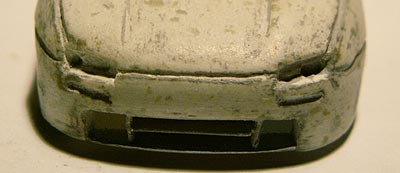
Here you see the engraved headlights and the sheet metal construction for the air intakes.
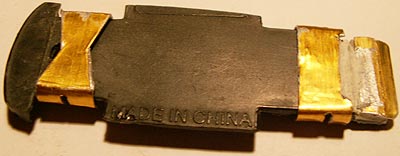
the base had to be redone for the wheels. Therefore i had to widen the wheelbase and add some sheet metal axle holders for the model. Also, i molded another part of the rear exhaust pipe area.
Then for a second time i tested the base with wheels on it to look how it would look like when finished. Usually I am really impatient at such things and try to figure out how things look like when finished although i´m in the middle of the project.
the base had to be redone for the wheels. Therefore i had to widen the wheelbase and add some sheet metal axle holders for the model. Also, i molded another part of the rear exhaust pipe area.
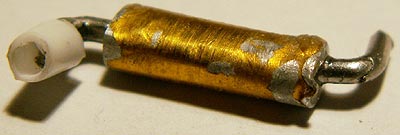
Soon after that i made the exhaust.
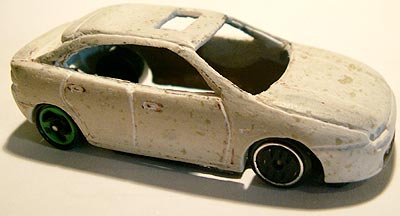
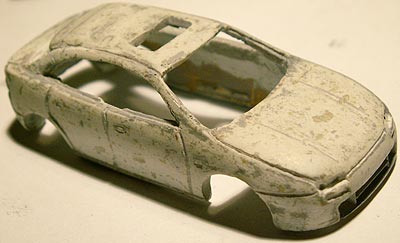
the body now got a first coat of primer which was used to make me see which imperfections there are. By doing so, I succeeded in removing most of the mistakes.
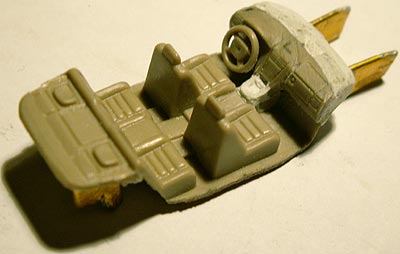
The interior of the car isn´t that important at such a small scale, but nevertheless i decided to remodel the one i used for the inside of the car. Originally it came from a Hongwell Mercedes C-Class police car beater I reshaped it and added some axle holders to it by useing sheet metal and "Repair All".
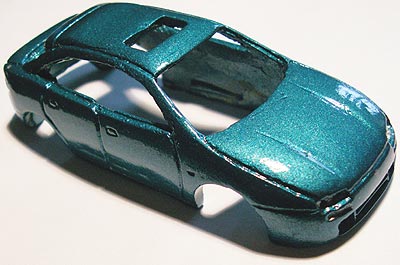
After the main work was done, the finer part of the project came.One coat of primer and two coats of color - i used the greenish blue Dupli Color spray from my local automotive parts dealer to imitate the original color of my brother´s ride. As you can see, there are still some imperfections, but keep in mind it is a fully handmade model with body made from scratch.
After the body was done i painted the interior and other parts.
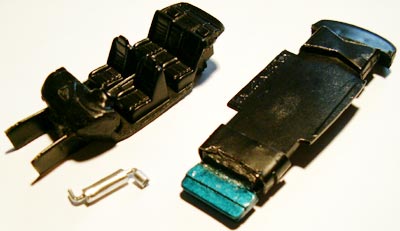
The last step was detailing the model the way it should be, adding custom made windows by useing Hot Wheels and Matchbox blisterpack plastics and ading the final wheels toadjust the ride height.
The last step was detailing the model the way it should be, adding custom made windows by useing Hot Wheels and Matchbox blisterpack plastics and ading the final wheels toadjust the ride height.
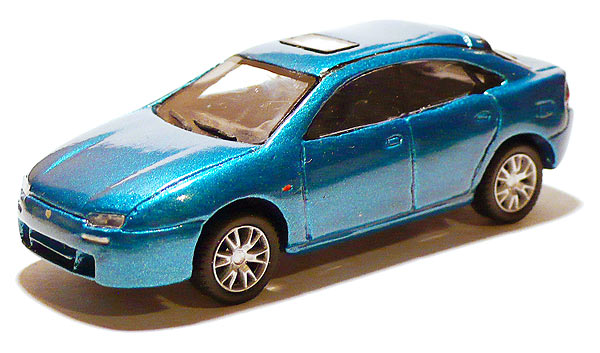
Here is the finished model. Enjoy the pics and i wish you good luck if you have got the motivation to do something similar in the future.

I hope you enjoyed this story just as much as i enjoyed making the model and writing about it.
Pictures © by Sinicars
I hope you enjoyed this story just as much as i enjoyed making the model and writing about it.
Pictures © by Sinicars
Custom projects